If you are a passionate AT-LP120 owner or consider becoming one, then you are likely aware of the LP120 preamp removal mod that is discussed in forums, reddits and in Youtube videos. Many owners can report that they have successfully removed the built-in preamp. While others still have questions on how to do it. And if it is worth doing.
Personally, I have read and watched my share of forum posts and YouTube videos that document the LP120 preamp mod. And it seems that pretty much everyone that takes on the project are very happy with the result afterward.
So, what is the point with this modification? What does the mod actually do?
The objective of the LP120 preamp mod is to remove a few electrical components from the LP120’s music signal path. Remove components that form what is called a low-pass filter or treble-cut filter that seem to filter out some of the higher tones from the music and reduces the LP120’s overall sonic performance.
The preamp removal modification removes this Low-Pass filter and makes the LP120 come to life musically. Opens up its top end. And, in essence, makes the LP120 sound better.
Edit: This upgrade only applies to the original version of the AT-LP120USB. To my knowledge, Audio-Technica has fixed this issue on their upgraded ‘X’ version, the AT-LP120XUSB, that was released in 2020 or so.
If you are interested in LP120 sound improvement in general, please also check out this article where I find the very best cartridge upgrade for the LP120.
I can report that I have finally removed the preamp from my AT-LP120. I did not go as smooth as I had planned. More on that later. But it is done. And it did the trick. The turntable now sounds more open and lively. It has become a better sounding turntable. It is not a night and day kind of difference. Upgrading the cartridge had a much bigger effect. But it made a difference.
And in this article, I will take a detailed look at the LP120 preamp removal mod. I will use pictures and schematics to explain why the LP120 preamp reduces the sound quality of the LP120. And I will show you three different ways to remove the preamp. Where two of the methods don’t require any extra cables at all.

I have to add that any attempt to follow this guide or in any other way modify your LP120 is totally on your own risk. You might destroy your LP120 if you get it wrong. And you will probably lose the warranty.
Also, don’ take my thoughts, opinions and advice in this article for absolute facts. Only the Audio-Technica engineers can give 100% qualified explanations of how the LP-120 internal circuits are designed and intended to work. I am just making qualified guesses. At best.
Why Remove the AT-LP120 Preamp?
To explain why the LP120 preamp causes problems as best as I can, I have made a few illustrations that I am going to use throughout this article.
In figure 1 below I have, to the best of my abilities, made a block-schematic that shows the LP120 signal path. It is based on visual inspections and probing with a multimeter, so there is a chance that it might not be 100% accurate.
Also, in reality, the main (circuit) board is bigger than the preamp (circuit) board. So the relative dimensions are not right in the figure. We’ll take a look at what these circuit boards actually look like in a second.

As we see in the figure, the “problem” with the LP120 is that the signal path is not pure, even when the PHONO/LINE switch is set to PHONO. The music signal still travels through the Low-Pass filter that’s is located on the preamp circuit board.
And it is well documented by the vinyl community that this Low-Pass filter actually removes (filter out), or at least dampens, some of the higher tones in the music. Making the LP120 sound a bit dark, dull, closed, lifeless and so on. Makes it lack in the top end. And that the LP120 actually sounds a bit better when the preamp with the Low-Pass filter is removed.
Wikipedia describes a Low-Pass Filter this way:
A low-pass filter (LPF) is a filter that passes signals with a frequency lower than a selected cutoff frequency and attenuates signals with frequencies higher than the cutoff frequency. The exact frequency response of the filter depends on the filter design. The filter is sometimes called a high-cut filter, or treble-cut filter in audio applications.
Wikipedia
It is hard (impossible) to calculate what the filter’s cutoff frequency is without knowing the exact values of the components (inductors and capacitors) that forms the Low-Pass filter.
If you have really good ears (or an oscilloscope) it might be possible to give an estimate based on what musical tones are filtered out from the music.
It is also hard to tell why the Audio-Technica engineers have added a Low-Pass filter in the signal path that actually removes parts of the music. It must be a good reason for it. Otherwise, they would not have done it.
My only idea and observation for why they have added the Low-Pass filter are that the preamp circuitry is located on the same circuit board as the USB circuitry. And The USB circuitry is a digital circuitry with oscillator and clocks etc. With the potential of making digital noise that might interfere with the music signal. Digital noise picked up by the music signal that then needs to be filtered out. Hence the Low-Pass Filter.
I have not investigated it, but I believe that the USB circuitry is only active (powered) when the turntable is connected to a computer with a USB cable. So a potential problem with digital noise might only be present when the turntable is used to digitize records. When the USB circuitry is active.
Which again means that the Low-Pass filter might have no real purpose when the turntable is not connected to a USB port that activates the USB circuitry. Which I guess is close to never for most people. Which again make sense since no LP120 owner seem to report a problem with noise after the preamp (and USB circuitry) is removed.
I am only guessing here, don’t take this as fact.
LP120 Internals
If we take a look inside the LP120, we’ll find the main board and preamp board as illustrated in the block-schematic in figure 1.

We see that the cables from the tonearm connect to the main board. And from there, the signal travels through the main board and directly to the preamp board without any components in the signal path. The main board act as a coupling for the cables only. There is no signal processing happening to the music signal on the main board.
From there, the signal travels through the preamp board and out from the LP120 through the RCA cable that routes the signal out of the box and to a receiver, external preamp or active speakers.
If we take a closer look at the preamp board itself in the figure below, we’ll find the components that form the Low-Pass filter at the top left corner. The filter is placed just beside the terminals that connect the RCA cable that routes the signal out from the turntable.

Schematically, the Low-Pass filter should look like this.

So how does this Low-Pass Filter work?
We see that there is an inductor in the signal path. And a capacitor between the signal path and ground. For each channel. Which form the Low Pass filter.
The inductors and capacitors will impact the music signal like this:
LP filter behavior at lower frequencies below the filters cutoff frequency (bass and midrange):
- The inductor has low impedance and act as a piece of wire. It does not affect the signal at all.
- The capacitor has high impedance and will not shortcut any of the signal current flow to ground.
- So both the components will pretty much act as they are invisible to the lower frequencies (tones) in the music signal. The signal will pass the filter as if the filter was not even there.
LP filter behavior at higher frequencies above the filters cutoff frequency (treble):
- The inductor will increase its impedance and act as a resistor for the music signal. And a part of the music signals amplitude will be “absorbed” by the inductor and not transferred to the output.
- The capacitor will decrease its impedance and start to shortcut parts of the music signal to ground.
- So as the frequency increase, more and more of the music signal amplitude will be “absorbed” by the filter and less and less of the music signal will pass the filter and travel through to the output.
Hopefully, these sections that we have covered so far have helped making you a little more knowledgeable about the core issue of the LP120’s preamp including the theory behind it. (PS! For anyone that is not educated in electronics, I fully understand that it might still be tricky to understand this fully.)
Let’s move on and look at how we can remove the LP120 preamp. I will show you three different methods.
How to Remove the LP120 Preamp?
For instructions on how to get the LP120 opened up, which screws to remove, and so on, I really recommend that you watch the LP120 preamp removal guide by Vinyl TV on Youtube. (Or any other good video guide on the topic that you might find.)
Vinyl TV’s video guide is a great foundation for anyone that considers removing the preamp. I do however think that there are two simpler and more elegant ways to remove the preamp. As I will explain in method 1 and 2 below.
Before we get into detailed instructions, here are the three different ways to remove the troublesome Low-Pass filter. In brief.
Method 1 (Most elegant)
1) Keep the preamp board inside the LP120.
2) Remove the Low-Pass filter components from the preamp board.
All cables are left intact. And now new cables needed.
Method 2 (What I ended up using)
1) Remove the preamp board from the LP120.
2) Remove the original RCA cables from the preamp board and connect (solder) them to the main-board.
3) Connect (solder) RCA ground to main-board ground on the main board.
No new RCA cables or separate ground wire needed.
Method 3 (As shown in Vinyl TV’s YouTube guide)
1) Remove the preamp board from the LP120.
2) Connect a new set of RCA cables to the main board (you can also reuse the original ones that is connected to the preamp board).
3) Add a separate ground wire that extends out of the LP120 and connects to receiver or external preamp.
New separate ground wire and (optionally) new RCA cable needed.
Now it is time to go into the nitty-gritty.
Recommended Tools
This really affordable soldering iron set from Amazon should include everything you need for the job. Besides a basic screwdriver to get the LP120 opened up. Just click on the picture to buy from Amazon (affiliate link).

I was stupid enough to jump into modifying my LP120 with a way too big, old and worn out soldering iron. As a could not find my preferred soldering iron for the job anywhere in my house.
This made me first destroy the pads of the inductors and capacitors on the preamp board when removing them. So method one was out of the picture. And then when I finally managed to get the mod done (moving from method 1 to method 2) the soldering looks like it is done by a five-year-old.
So it is highly recommended to buy a kit like this if you don’t already have a soldering iron suitable for modifying electronics. And then use one of the smaller soldering tips that come with the set.
Method 1
In this method, we’ll keep the preamp board inside the LP120 and all cables intact. The only modification we’ll do it to remove the components that form the troublesome Low-Pass filter from the preamp board.

The benefit of keeping the preamp board intact is that the option for using the built-in preamp is still there and that the USB functionality is still there if you want to use the LP120 to digitize records.
And, it might actually be easier to perform this modification than the other alternatives since we can keep all cables just as they are. No need to change which circuit board the RCA cable connect to etc.
To remove the Low-Pass filter we need to do two things.
- Shortcut the inductors (L606 and L607) that are placed in the music signal path.
- Remove the capacitors (C631 and C632) that are placed between the music signal path and ground.

By doing this, the signal path will be totally pure and there will be no components left to filter out the higher tones from the music.
Step 1
Get the LP120 opened up following Vinyl TV’s YouTube guide.
Step 2
Watch the below video to learn how to remove SMD components.
IMPORTANT!
I did not follow the instructions in this video and managed to destroy some of the pads on the circuit board when removing the components.
Which is highly embarrassing since I used to do this for a living for ten years or so.
So please watch this video carefully!
Another (and better/easier) way to remove SMD components is to use two soldering irons and heat up both terminals at once. The downside is that you will need two soldering irons. Might be worth considering.
Step 3
Remove the following components from the board.
C631 & C632
L606 & L607
Step 4
Shortcut the pads where L606 and L607 were mounted.
Shortcut pad 1 and 2 were L606 was mounted.
Shortcut pad 1 and 2 were L607 was mounted.
This can be done by stripping a piece of thin electronic wire and from the stripped part, and cut two pieces that are just long enough to cover the pads. Basically just as long as the inductors we remove. Then solder the small pieces of wire to both pads so that the pads that used to hold L606 and L607 is now shortcutted. (Electronic wire is included in the soldering iron set recommended above.)
Step 5
Assemble the LP120 back into one piece and you have successfully modified it so that it no longer filter out higher frequencies from the music.
Endnote on method 1
Unfortunately, I have not tested this method. Since I managed to ruin the circuit board when trying to do this mod. Bummer!
But in theory, this seems to me to be the most elegant way to mod the LP120 in my opinion. It is definitely my favorite method.
Method 2
After screwing up trying to modify my LP120 using method 1 above (destroying SMD pads on the preamp circuit board), I ended up using the method I will describe here. As my plan B.
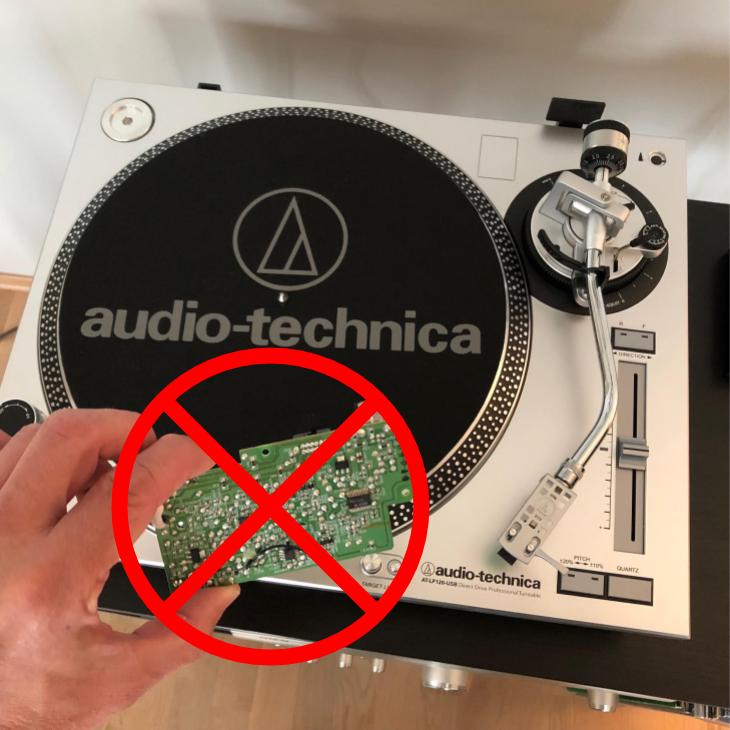
In this method, the whole preamp board will be fully removed from the LP120. As opposed to just removing the four components that form the Low-Pass filter from the preamp board as described in method 1. So there will no longer be possible to use the built in-preamp or the USB functionality when the LP120 is modded this way.

Just as in method 1 above, we do not need to add an external ground wire that travels out from the LP120 with this method. Only the RCA cable that already comes out of the LP120 is necessary. We do however need to remove the RCA cables from the preamp board and solder them to the main board instead.
Without any modification, the ground (shield) on the RCA cable that goes out of the LP120 is grounded to the preamp board inside the LP120. This is why we don’t need to use a separate ground cable with the LP120. Turntables often have a separate ground cable that needs to be connected to a separate ground terminal on the receiver or preamp. But the LP120 is grounded to the receiver or preamp through the ground on the RCA cables.
And in this method, we will use that grounding principle. Since we remove the preamp board, and move the RCA cable from the preamp board to the main board, we’ll need to ground the RCA cable to ground on the main board.
Step 1
Cut the ground wire that connects the preamp board to the LP120 ground.
(It is not possible to remove the LP120 preamp board without cutting this wire.)
When you cut the ground wire, cut it close to the terminal on the preamp board. So that there is a decent part of the ground cable left inside the LP120. Around two inches.
Then, cut the ground wire on the other end so that we end up with a loose pice of ground wire that is about two inches. We’ll need that piece of wire later.

Step 2
Remove the four screws and undo the preamp board.
Cut the RCA cable that connects to the preamp board. Cut it very close to the terminals on the board.
Step 3
Undo the Power connector from the preamp bard. The power connector is the white connector with a red and white cable.
Also, undo the RCA cable clamp.

Step 4
Remove the preamp board from the LP120.
Step 5
Strip the terminals on the RCA cable we removed from the preamp board in step 2. Like this.

Step 6
Solder the RCA cable to the main board. Like it is tone in the figure below.
The red RCA wire connects to the pad that can be traced to the pad where the red wire from the tonearm is connected. Same for the white. The two pads to the right of the red and white cables is ground and shall be connected to the ground of the RCA cable.
Then connect RCA ground to main board ground using the leftover ground cable we made available in step 1. That is the short black cable that connects from the very left pad to the very right pad in the picure below.
Before the ground cable is soldered on, it needs to be stripped just like we did with the RCA cables in step 5.
And, hopefully, you can make soldering job look prettier than I managed to do! As shown on the picture below. But it works.

Step 7
Reattach the RCA cable clamp.
The RCA clamp will need to be repositioned on the cable to make the cable reach the main board inside the LP120.

Step 8
Assemble the LP120 back into one piece and you have successfully modified it so that it no longer filter out higher frequencies from the music.
Endnote on method 2
I used this method and it works beautifully. You might be worried that the turntable will generate a hum or noise because there is no separate ground wire that connects to the external preamp. But my LP120 is dead quite doing it this way. No hum or noise at all. It is grounded the same way as it is from the factory. Using the ground on the RCA cable.
Method 3
This method is very similar to method 2 above. With the exception that we will route the main board ground out of the LP120 with a separate ground cable. As opposed to connecting the main board ground to the ground on the RCA cable as we did in step 6 in method 2.

Also, if you want to keep the RCA cable attached to the preamp board after the preamp board is removed, we will need to use a separate set of RCA cables in this mod. If you choose to keep the original RCA cable attached to the preamp board when it is removed, it will be pretty straight forward to put the preamp board back into the LP120 if you change your mind later.
(Using a separate set of RCA cables is also an option in method 2 by the way.)
To do this mod, just follow the steps in method 2. When you get to step 6, the only difference is that you won’t add the short ground cable between main board ground and RCA ground. Rather you will connect a longer ground cable to main board ground that travels out of the LP120 together with the RCA cable and connects to the GND terminal on your receiver or preamp.
Main board ground is the pad left of the pad where you solder on the red RCA wire.
This method is also described in detail in Vinyl TV’s guide on YouTube.
AT-LP120 Preamp Removal – Before and After
Removing the preamp does definitely have a positive effect on the LP120 sound quality. It does no longer appear as muted in the top end.
Conclusion
The preamp mod is a valid way to increase the sonic performance of the LP120. But opening up the turntable and modifying the internals might not be for everyone.