As vinyl enthusiasts, most of us share a common trait.
We want more from our turntables and record players.
Better sound.
Less noise and disturbance.
Tweaking, improving, upgrading and modifying our gear is a big part of our hobby.
Sometimes it makes most sense to invest in a completely new turntable.
But there are usually many options to get more out of the gear we already have.
Below are my top turntable hacks, mods, tweaks and upgrades that will improve the performance of your existing vinyl setup.
Essential Turntable Upgrades
We start off with three major upgrades that might have the biggest effect on the performance of your turntable.
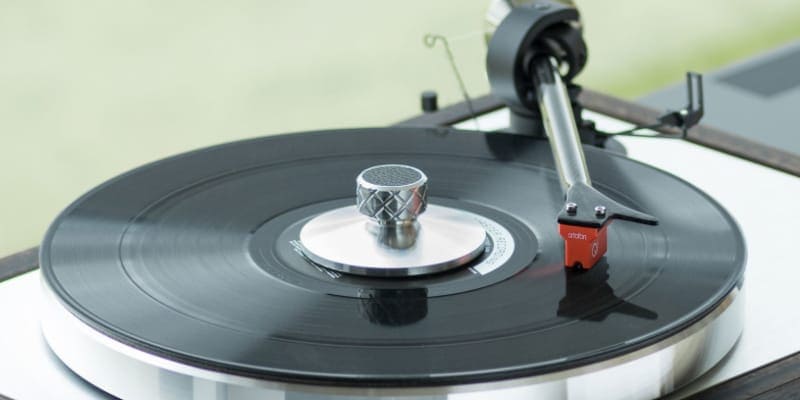
1. Upgrade the Turntable Phono Cartridge
My number one tip for improving the sound of your turntable is to upgrade the phono cartridge to one of better quality.
The cartridge is the first component in the signal chain and the performance we lose at this stage cannot be gained back later on. Whether that is lost sound quality or introduced unwanted noise.
The quality of the cartridge also has a huge impact on the sound quality of any turntable so the actual performance we might lose at this stage can be significant.
It seems to me that many turntable manufacturers often fit mediocre cartridges to their turntables to make them cheaper and available to more people. I believe the engineers at leading turntable manufacturers often want their turntables to be sold with better cartridges but lose the internal battle with the marketing department that wants the turntable to sell cheaper or fit a certain price spot in the market.
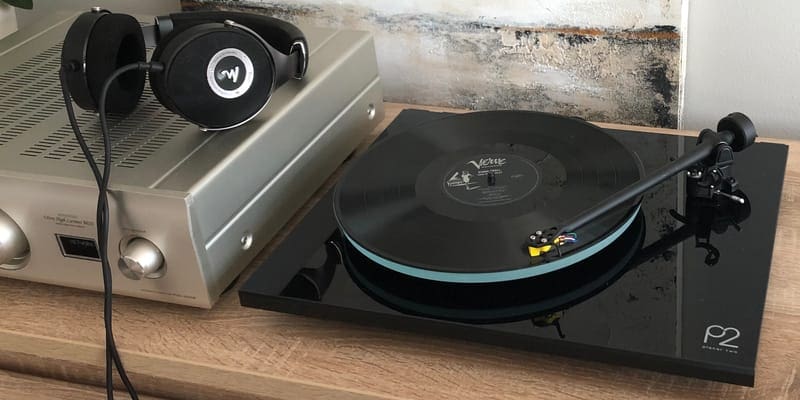
When I upgraded the stock Rega Carbon cartridge on my Rega Planar 2 to a much higher quality Rega Exact cartridge, the sound of the turntable was totally transformed. I am confident that there was no other upgrade I could do to my system that would have the same effect for the same amount of money.
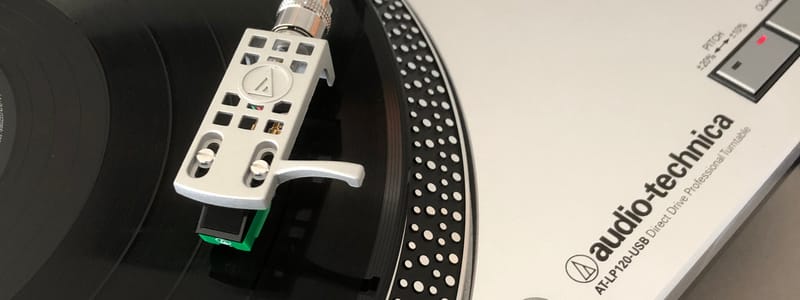
The same happened when I upgraded from a AT95E cartridge to a VM540ML on my Audio-Technica AT-LP120USB. The sound of the turntable was transformed.
The sound became much more open, detailed, dynamic, musical, engaging and enjoyable.
I highly recommend that the first thing you consider if you want more from your turntable is a cartridge upgrade.
2. Upgrade the Stylus (Needle)
A performance increase can also be achieved by upgrading the stylus to one of better quality. By upgrading the stylus, you can continue using the cartridge body that is already mounted to the turntable.
It is easier to upgrade only the stylus compared to upgrading the whole cartridge. You don’t have to re-align the cartridge and fiddle with those tiny connectors. Which can be a bit tricky, especially if you are a non-techie.
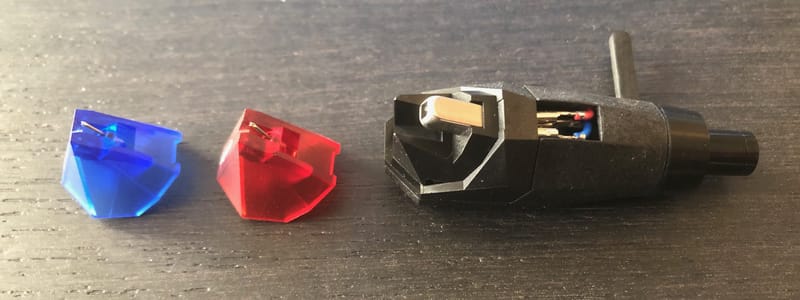
Many popular cartridges come with replaceable styli. This way, you can easily replace the stylus when it is worn. But you usually don’t have to replace the stylus like for like. You can often choose to upgrade.
On the popular Ortofon 2M Red cartridge, to give you an example, it is possible to fit a higher quality 2M Blue stylus that is more analytical and provides more details. The Ortofon 2M Red and Blue has the same cartridge body, so their styli are interchangeable.
Another example is the popular Audio-Technica VM95E cartridge that can be upgraded with multiple styli of better quality without changing the cartridge body.
A higher quality stylus usually has a nude stylus tip that is shaped from whole diamonds whereas lower quality styli usually have a metal shank boded between a smaller diamond tip and the cantilever. A nude stylus has a lower mass than one that is bonded which enables a nude stylus to be quicker and track details more precisely. On top of that, higher quality nude styli usually have a more sophisticated stylus shape which also increases its ability to track the grooves more precisely.
Upgrading the stylus can have a big impact on the sound of your turntable. If upgrading the whole cartridge is out of the question, then a higher quality stylus used with your existing cartridge body is a valid alternative.
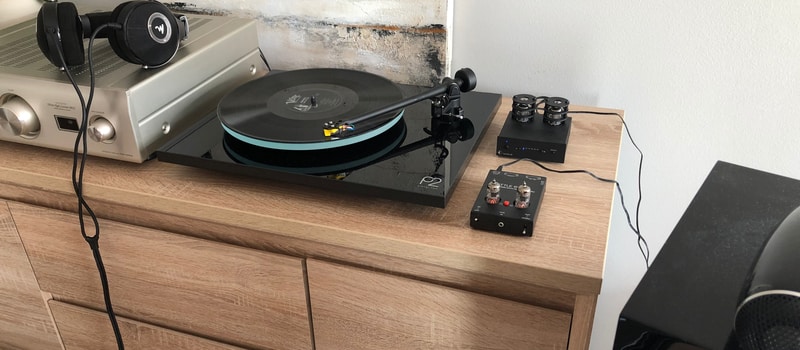
3. Upgrade the PHONO Preamp
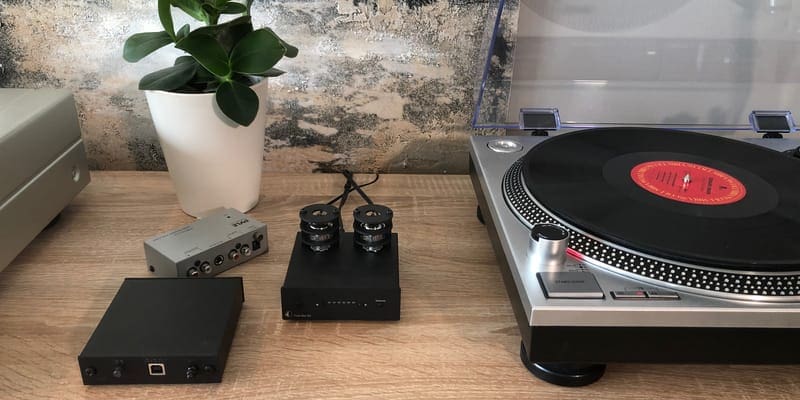
If you are currently using a cheap external phono preamp or the one that is built into your turntable or receive, it might be significant performance left on the table that you can tap into with an external phono preamp of high quality.
The phono preamp amplifies the tiny PHONO signal from the cartridge into a LINE Level signal that is compatible with standard analog inputs on receivers and powered speakers. It is the second component in our signal chain after the cartridge, and the performance lost with a low-quality phono cartridge cannot be gained back later on.
If you are a casual vinyl spinner with an entry-level or midrange vinyl setup, I generally recommend that you spend money on a good cartridge and good speakers before you put a lot of money on an expensive phono preamp. I have done a lot of testing of phono preamps from very cheap to relatively expensive and found that they do definitely make a difference, but not as big of a difference as a significant upgrade of the cartridge or speakers.
If you have invested in a cartridge of good quality and have a vinyl setup with a good performance overall, then a high-quality preamp might be the missing ingredient that brings out the final magic to the sound of your system.
Personally, I invested in a decent tube phono preamp as the final major upgrade to my vinyl setup and I have never looked back. It added warmth, smoothness and richness to the sound of my system in an awesome way. But I still think I did the right thing when I upgraded my cartridge to a very good one before I invested in an expensive preamp.
Cool Turntable Hacks
Here are three cool turntable hacks that you might not be aware of.
4. Make Your Turntable Wireless
One of the new features that has become popular on entry-level turntables and record players is wireless Bluetooth functionality. Bluetooth makes it possible to stream music wirelessly from the turntable to Bluetooth headphones, receivers and speakers at a distance up to 30 feet. No cables needed.
It is also possible to add Bluetooth functionality to a regular turntable with a Bluetooth adapter.
So, if you have an old turntable or just bought a new one without Bluetooth, it is still possible to make it wireless. The adapter connects to the output of your turntable and can be powered both by battery and by a power supply.
Note that you will need to add the adapter after your external phono preamp if you run a turntable without built-in preamp.
You might sacrifice a bit of sound quality with Bluetooth because it is a digital and compressed protocol. This is why Bluetooth is commonly found on only entry-level turntables. For higher-end applications, it is still best to use the good old signal interconnect to connect your turntable. For the best possible sound quality.
5. Go Audiophile on the Cheap with Headphones
My number one tip to get truly amazing sound from your turntable without spending a fortune on a high-end amplifier and speakers is to invest in quality audiophile headphones.
I’ve heard several hardcore audiophiles say that you can get better sound with $1 000 headphones than with $10 000 speakers. And I think there is a lot of truth in that.
The reason headphones can give so much more performance for money than speakers is that manufacturing (and shipping) costs of headphones is much lower than for high-end speakers.
Quality speakers need 2-3 expensive drivers in each speaker, sophisticated (and costly) crossovers and cabinets that are solid, heavy and expensive to store and ship.
Headphones only needs one driver per channel, no crossover and no big and expensive cabinet. They are small, easy to store and inexpensive to ship. This enables the manufacturer to put much more money into the few key components that form the headphones. They can fit two super sophisticated and awesome sounding drivers and still sell the headphones for a fraction of what set of equally sophisticated speakers would cost.
With headphones, we also eliminate all issues with poor listening room acoustics. Making speakers sound amazing in a normal sized room can be very tricky due to booming bass from standing waves and reverberation.
I do much of my vinyl spinning using my Focal Elear audiophile headphones. They cost about $1000 list. Their sound is detailed, dynamic, punchy and really engaging. The stereo imaging is amazing. In many ways, they give a much more intense and emotional listening experience than my $5 000 amplifier and speakers combo. Even with a very affordable headphone amplifier.
The clue when choosing audiophile headphones for vinyl spinning is to skip wireless headphones with noise cancellation. What we want is cabled and open headphones designed to provide high-end sound. Nothing else. And they don’t need to cost as much as $1 000. $3-500 open cabled headphones will get you a long way and will outplay quite expensive speakers in many ways.
6. Create Magic with a Tube Preamp
Tube amplification is known to add richness, smoothness and warmth to the sound of a stereo setup.
Some call it magic. Tubes make music more musical. More alive.
There are several ways to add tubes to your vinyl system to enjoy the magic sound it provides.
One way is to use a tube PHONO preamp. This is generally the easiest and cheapest option in a vinyl setup.
Another way is to use a tube integrated amplifier to power the speakers. This will generally cost more. Tube amplification generally output less power than solid state amplification, so this option will work best with carefully selected speakers that have medium to high sensitivity.
Some even go tube all the way, but my experience is that we can enjoy some of the tube magic with a decent tube phono preamp. This is a natural starting point for vinyl spinners that are excited to add some tube magic to their vinyl setup.
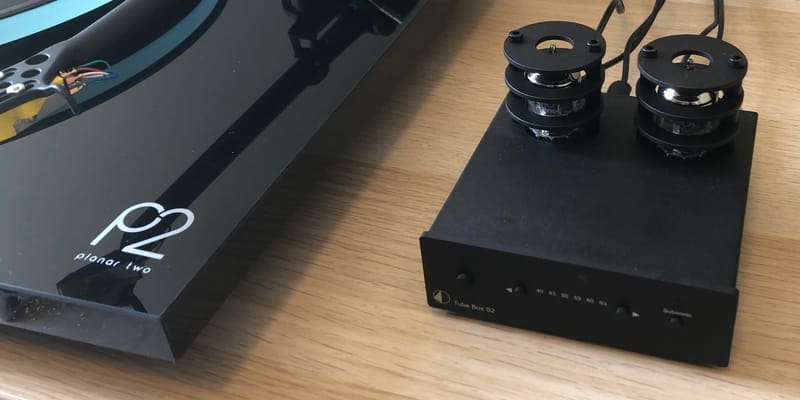
Personally, I own several preamps, but it is my Tube Box S2 that most often wins the preamp spot in my vinyl setup. Its tubes add a touch of the smoothness which I enjoy quite a bit.
Popular Turntable Mods and Tweaks
Below are six turntable mods that are popular and easy to do. Pro-Ject is one manufacturer that offers great accessories for these mods and tweaks. You can also buy these items on Amazon.
7. Upgrade the Turntable Mat
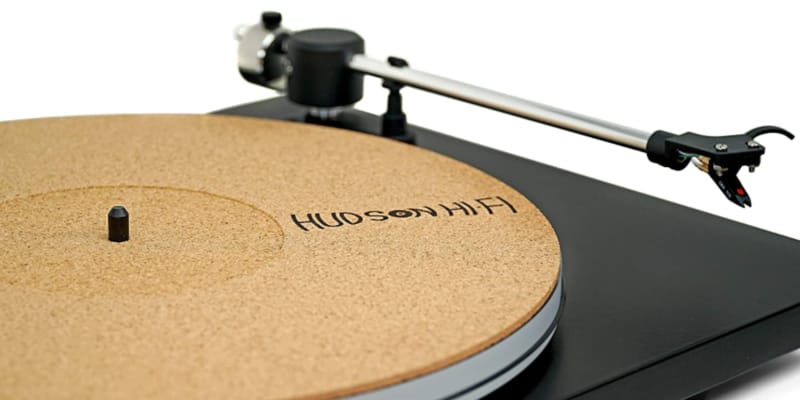
Many entry-level and midrange turntables come stock with very simple mats. When I upgraded to an aftermarket rubber mat on my AT-LP120USB turntable, I noticed a subtle improvement in the sound quality.
Upgrading the mat is a simple, affordable and popular way to upgrade a turntable. It can be especially efficient on turntables that come with metal platters as a better mat will help dampening the ringy nature of the sheet metal.
Rubber and cork are two common martials found in aftermarket mats. Both can help tighten up the bass and reduce noise and sibilance. Cork is known to deal better with static electricity than felt and rubber mats.
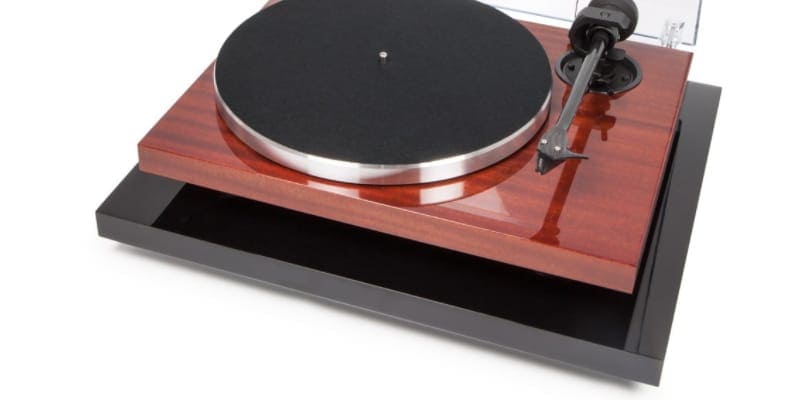
8. Change to an Acrylic Platter
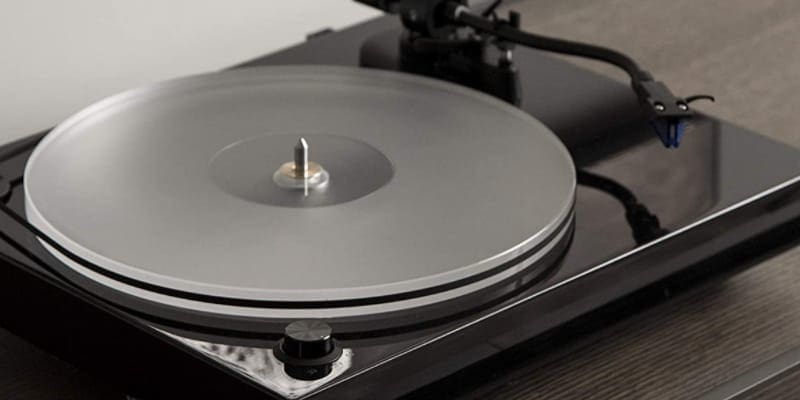
If you have a turntable with a metal platter, you will likely experience an increase in sound quality if you replace it with a more sophisticated acrylic platter.
Acrylic platters are often designed to have a better fly-wheel effect than metal platters, which makes the record rotate with a more stable speed. A stable speed is crucial to achieve the best sound from a turntable as our ears (and brains) are super sensitive to wow and flutter.
An acrylic platter also has the benefit that it can be used without a mat of any type. You can skip the mat and eliminate a lot of issues with static electricity and all the issues with dust and debris that tends to stick to turntable mats.
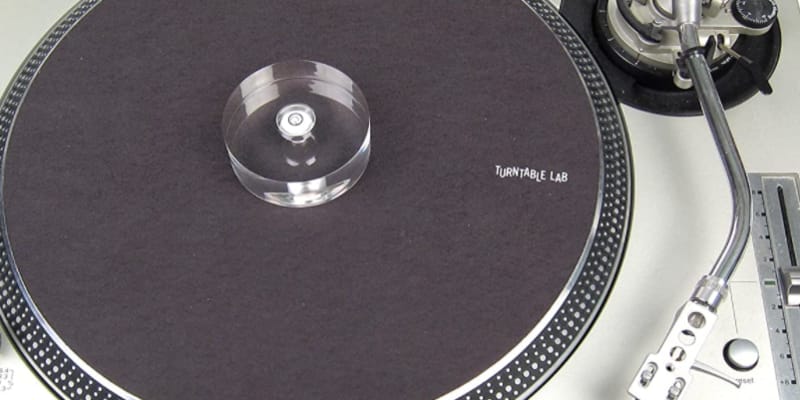
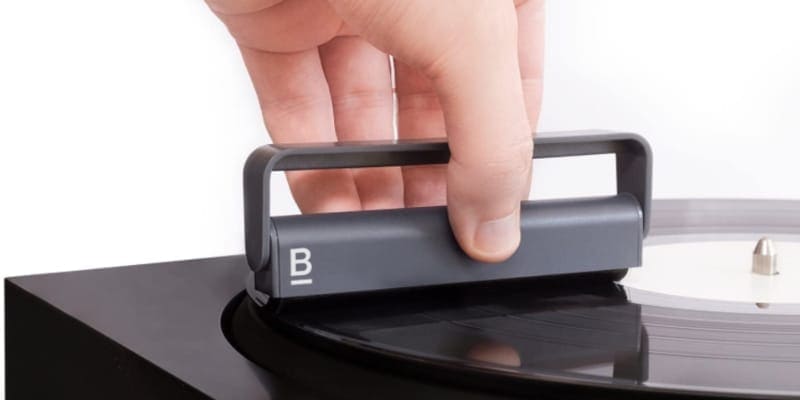
9. Use a Record Clamp
A record clamp is a handy tool that is used by many vinyl enthusiasts. It reduces unwanted resonances by mating the record and platter firmly together. A clam can also help level out records that are heavily warped.
A record clamp clamps around the center spindle and achieves this without adding significant extra weight on the record.
Extra weight can cause the bearings to operate outside their specifications.
Because of this, a clamp is often recommended over a record puck/weight.
10. Add an Isolation Base
An isolation base helps isolate the turntable from the vibrations coming from the speakers.
This can be a significant improvement, especially if you run big speakers that put out a lot of bass than can be picked up by the cartridge and cause issues.
Reducing the vibrations will make the turntable track better and provide better dynamics, details and timing.
11. Change to Low Capacitance Signal Cables
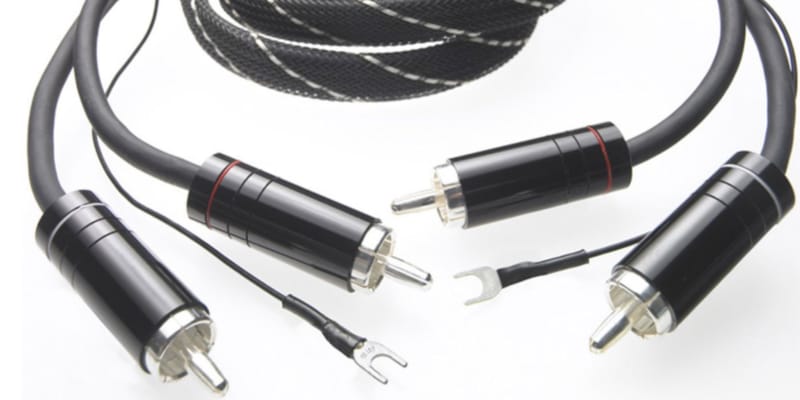
Using low-capacitance signal interconnect can significantly improve (flattening) the frequency response of your system.
If you run RCA cables that have poor quality, they might add too much capacitance to the connection between the cartridge and the PHONO input. This might furthermore add a peak to the high frequencies (treble) in your vinyl setup. Which makes it sounds bright and top heavy.
Using signal cables of decent quality that are designed for turntables will reduce the possibilities for an unnatural bright sound character due to high-frequency resonance.
12. Upgrade the Turntable Power Supply
Another popular upgrade that is easy to do is upgrading the power supply for your turntable.
Clean energy is crucial when we want the optimal sound from a turntable. Upgrading to an aftermarket power supply that use more sophisticated power and filtering technology than the simpler power supplies that come stock with entry-level and midrange turntables is definitely an upgrade that should be considered.
It is, needles to say, important that you double and triple check that an aftermarket power supply has the exact same voltage and polarization as the stock power supply before you connect it to your turntable.
Basic Vinyl Tips and Tools
We continue with four elemental tips and tools that every vinyl spinner should be aware of.
13. Level the Turntable
A turntable needs to be perfectly level for optimal performance. If a turntable is not level, this might cause channel unbalance, skipping, jumping sibilance, wow and flutter. All kinds of issues that you don’t want.
The reason why it is so important that a turntable is perfectly level is that the needle is pulled into the grooves by gravity. If the turntable is level, then gravity pulls the needle towards the center of the grooves, which is what we want. When a turntable is not level, then gravity will pull the needle towards one side of the groove, not towards the center, which can cause a lot of issues, as listed above.
To level the turntable, you can use any kind of leveler, or a leveler made specifically to level turntables. Turntables usually have adjustable feet to make it easy to level the turntable.
14. Verify Cartridge Alignment
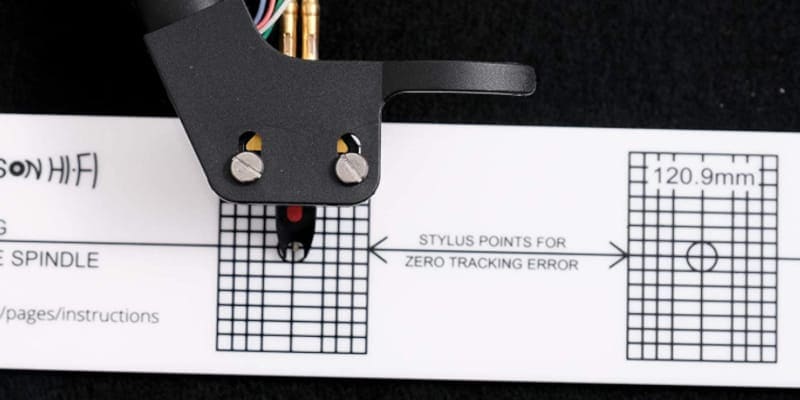
The turntable cartridge needs to be perfectly aligned to perform at its best. This is usually taken care of by the factory, but it is often a good idea to verify the alignment on your own. If you replace the cartridge it is essential that you align the new cartridge before you start using it.
To align the cartridge, we use a protractor. This can be found online for free or bought online or from your Hi-Fi dealer.
Use the link above for a free protractor.
Here is a short video that shows you the process.
15. Verify Stylus Tracking Force
Every phono cartridge comes with a specified tracking force that should be met for ideal performance. It is usually between 1.5 and 2.0 grams. The exact value can be found on the cartridge manufacturer’s website.
We adjust tracking force by rotating the counterweight on the tonearm. The usual process is to first adjust it so that we have zero tracking force (the tonearm is floating in the air) and then rotate the counterweight the amount of rotation specified to achieve the tracking force specified for our cartridge. The amount of tracking force is often specified as one gram per 360 degree rotation on the counterweight. Or something in that range.
It can, however, be a bit tricky to get the tracking force spot on by relying on the process described above. It is hard to be absolutely sure that we have hit the correct amount of rotation.
To make this process easier and more exact, I recommend that you get yourself a stylus force gauge. It doesn’t cost much and will give you complete control of the tracking force you have set on your turntable.
16. Keep Your Records Clean
Dirty records never sound good. There will be surface noise, cracks and pops that might ruin the music listening experience.
To take care of your records and make them sound good, it is advised to use an anti-static brush to remove dust and static electricity every time you put a record on play.
From time to time you should also use a velvet brush and a vinyl cleaning solution for a deeper rinse and to remove grease and fingerprint that tends to build up over time.
Simply keeping your records clean might actually make the biggest difference in sound quality of all the tips in this article. It is very important.
Don’t Overlook Room Acoustics
My final tip is a bit outside the box, but it can be a very effective way to make your vinyl setup sound a lot better.
17. Improve Listening Room Acoustics
A room with bad acoustics can ruin the sound of any Hi-Fi, no matter how expensive.
The first speakers I bought as a teenager were (believe it or not) a pair of super high-end Bowers and Wilkins 802 that today cost more than $20 000. I also had great electronics. But it was impossible to make them sound good in my tiny room in my parents’ house. That room just had too many issues with standing waves and flutter echo. I ended up selling them without ever experiencing their true potential. Back then I had no knowledge about room acoustics, so it wasn’t even on my radar to try to improve the sound of the room.
My first tip on this topic is to play a tune with a steady bass rhythm. I use Daft Punk – Get Luck for this exercise. Gets me in a good mood to! Then slowly walk around in the room and observe how the bass has different intensities from spot to spot. In spots where standing waves add up you will experience booming bass. In other areas of the room the standing waves might cancel each other making the bass almost absent. Your ideal listening position will be a sport where the bass (and frequency) response is neutral. Don’t underestimate the impact of room position on bass response. Especially if you run big speakers with decent bass, this phenomenon might surprise you a lot.
My next tip is to add soft and uneven surfaces to the room to dampen and diffuse echo. Add a thick carpet in front of the speakers, a bookshelf filles with books, big plants, soft furniture, etc. It can help dampening the room a lot. Making your Hi-Fi sound a lot better. You can of course invest in dedicated acoustic improvement products, but it might cause a divorce if you take that one too far!
My last tip is to try to place the speakers so that there are at least 85 cm between each side wall and the center of the speakers. This will make the first reflection from the side wall being delayed just enough so that our brains cancel them out. It can dramatically improve details (clarity) and imaging.
Room acoustics is a big topic with a lot to it. The three tips above form a great starting point on your trip to a better sounding room. There are lots of great videos to watch on YouTube if you want to dig deeper into this topic.
Vinyl Restart was featured in an article on Redfin where Experts Share Their Best Tips for Creating Your Home’s Vinyl Listening Room. Check it out, there are a few good tips in there.
Conclusion
If you managed to get through this rater long article, I hope that you learned something from it. That you got a few new ideas that you might want to explore.
I am passionate about great vinyl sound and you will find other interesting articles on the topic if you browse through the articles here on Vinyl Restart.